Tuesday, February 19, 2013

Shrimp Lasagna Tricolori

SHRIMP LASAGNA TRICOLORI

It's not something to cook at launch break but to prepare at home. 


It's been a while since my last post, so I wanted to restart with something special. Inspired by the scandals about horse meet in lasagna I've decided to make one by myself. This is how I did it.
Actually I have no idea if this is somehow traditionally Italian, but the herbs and spices used are very common for the Italian kitchen so the flavour can be seen as Italian.

My Rating 

(feel free to add your own in the comments)
  • ★ Taste - This is really awesome! A mix of Italian spices and shrimps. And still no horse involved here. Guaranteed
  • ★☆☆☆ Price - It may get a bit pricey in total but not per dish. If you're on a budget, just leave the shrimps out or replace them with chicken breast. 
  • ☆☆☆☆☆ Time - Prepare it the day before. It'll take some time. 
  • ★★★☆ Healthiness - Very good, just avoid to use too much cheese and oil.
  • ☆☆☆ Simplicity - Well, you have to handle several grounds of action at the same time, but everything is all easily doable.  


Ingredients


Note: This list is ordered by importance of the ingredients.
  • 12 Lasagna plates (4 for each layer in this case. The actual count depends on your baking dish)
  • Tomato paste
  • Basil 
  • 250g of small tomatoes (like cherry tomatoes)
  • 1 Mozzarella cheese
  • Green Pesto
  • 50ml of Olive Oil 
  • 2 Red Bell Peppers
  • 2 White Onions 
  • 2 Zucchinis  
  • 1/2 Eggplant
  • 250g Shrimps
  • Rosemary
  • 50g of Flower
  • 1 Spoon of Sugar
  • Lemon Juice
  • Garlic (if you like and can)
  • 2 Laurel Leafs
  • Eruca Sativa (Rucola) 

Directions


  1. We are going to prepare two sauces. A red one with tomatoes and bell pepper and a green sauce with eggplant and zucchini.

  2. Cooking the Red Sauce with
    Tomatoes, Bell Pepper and Basil.
    The Red Sauce: Let's start with the red one. Cut the small tomatoes to four pieces each. Cut the bell pepper and one onion into little squares. Put everything together with olive oil into a medium sized pot and set it to a mid-high temperature.
    It is supposed to look like the picture above. When it is boiling a bit, add a bit of the green pesto, some basil leaves and some chopped rosemary leafs to it and stir.
    The tomato-pepper sauce will lose some water over time. Once it seems like the sauce is becoming too dry, add some more water. If there is a lot of water then, add salt, pepper, sugar, lemon juice and tomato paste.
  3. Stir fry the Green Sauces
    Ingredients.
  4. The Green Sauce: Prepare a second pot. Cut the eggplant, the two zucchinis and the other onion into small pieces. Put everything together with some olive oil into the pot and power your cooker up. Stir everything from time to time. The vegetables are supposed to get a bit darker from frying. After some time, add the laurel leafs.
  5. Mix the Topping in a Bowl
  6. The Topping: Put the unfrozen shrimps in a bowl. Once again, mince some tomatoes and one half of a bell pepper into little pieces. Add these together with some basil leaves, rucola, olive oil, bell pepper powder, pepper and salt. Add some flower to it and mix everything. The flower will consume some water and make the shrimps soak up more of the sauce. At the same time they will become crispier.
  7. The Assembly:
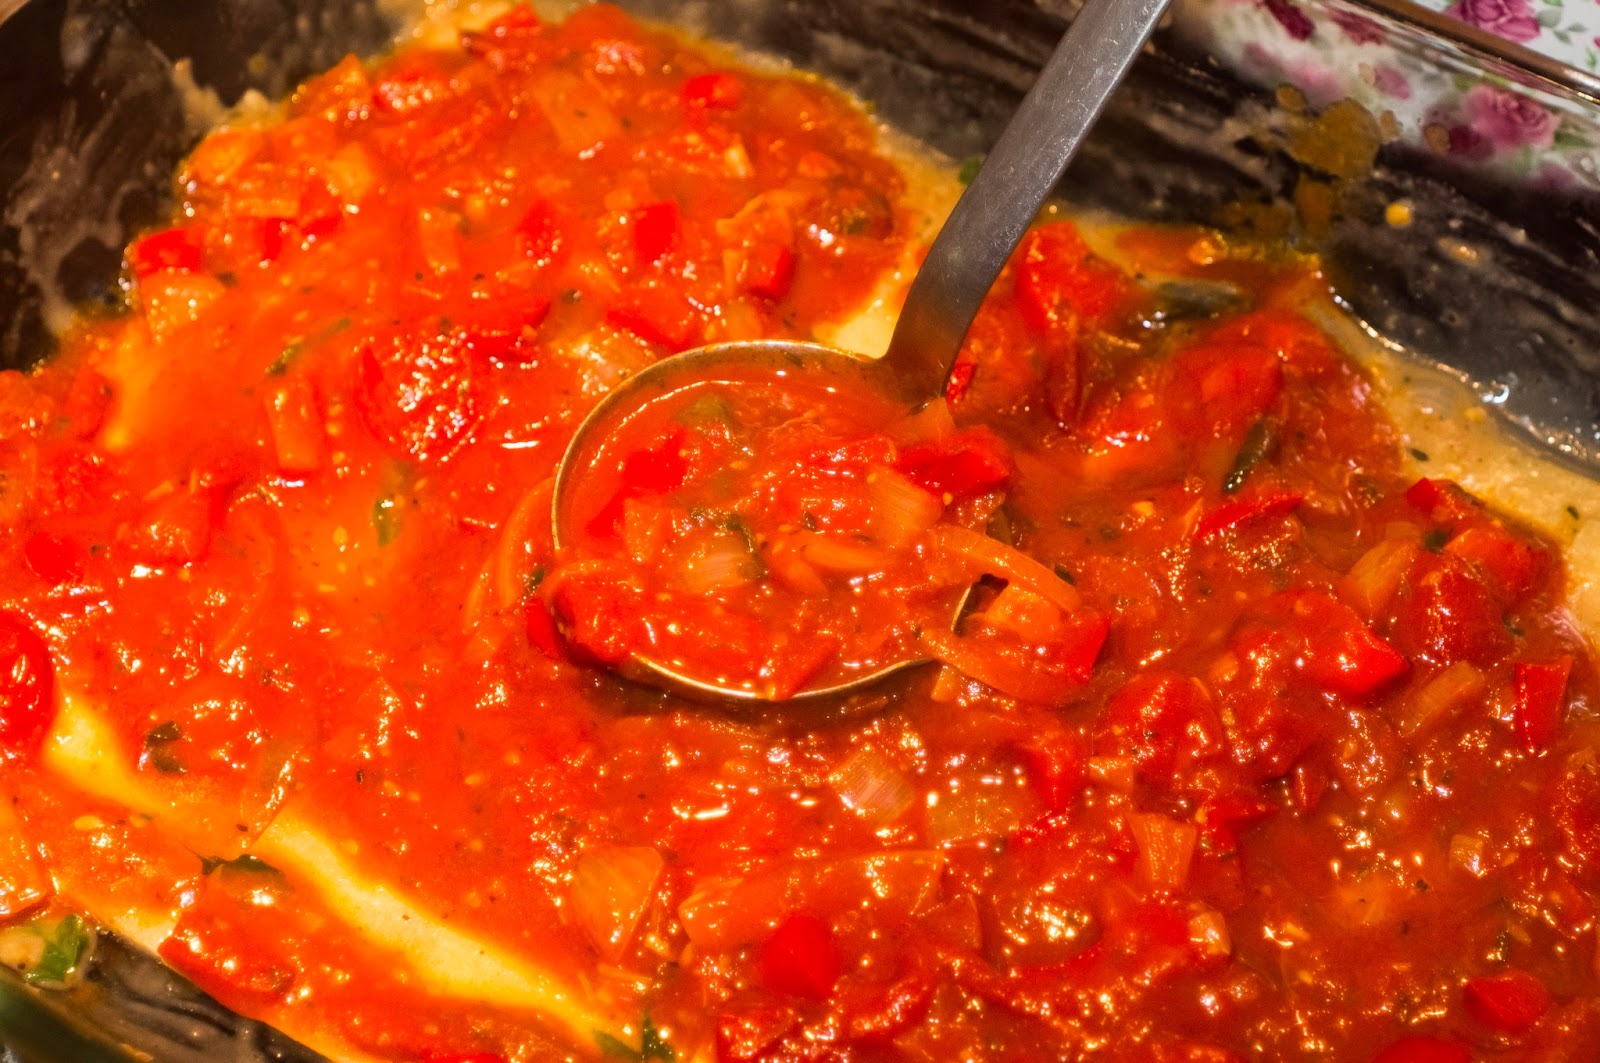
    Start with the Red Sauce
    Distribute a thin layer of the green sauce without any vegetables on the backing dish. This is the basis for the first layer of pasta. In this way, the pasta can consume liquid from the bottom and from the top to get the right consistency. And, most importantly, it won't stick to the bottom and you can get it out easily later.
    The top-most layer
    One important thing to remember is to cover all of the pasta when constructing a new layer. If you leave out any part it'll burn while baking and can become very hard.
    After you have spread out the first level of the lasagna plates, distribute the red sauce equally on top of it, cover it with pasta again and do the same for the green sauce including all the vegetables this time. Remove the laurel leafs from it, if you haven't already.
    Top-most layer before baking.
    Now this layer also gets a layer of lasagna plates on top. Again, distribute the red sauce on top. Once this is finished, finally add the most yummy layer on top - the one with the shrimps and the Mozzarella cheese. Do not put a pasta layer in between these last two.

     
  8. Baking: There is no need to preheat the oven. In fact you can use the not-pre-heating to perform a little trick: If your oven has a grill, set the temperature to 180° and let it up the oven and to grill the surface of the lasagna a bit. Therefore put the lasagna on a lower level, so that it isn't exposed to the heat of the grill too directly. If the temperature has reached 180° or the surface is getting too dark, deactivate the grill and switch to air-circulation-mode instead. Now, wait approximately 35 minutes for your lasagna to finish. If the surface is not getting some color, increase the temperature carefully up to 200°. However if the color becomes too dark, lower the temperature to approx. 170°.


Dinner is ready :)
Enjoy!


Make it Special

(these are optional and depend on your personal preference, time or money)
  • Olives
  • Spring Onions
  • Even more Basil! There is no way to put to much on it :)
  • Stir fry the scampi separately and add them on top of the lasagna when the cheese has melted a bit.
  • More seafood! Squid or mussels are a good addition (or replacement) for the shrimps.
  • Spice it up with massive amounts of garlic. Especially the marinade for the shrimps should be enhanced by its original flavour.
  • Make it spicy. I'd recommend to add some red hot chili peppers to the red sauce and keep the green sauce well tempered, so that there is a good contrast while eating. If the one sauce is too spicy, you simply mix it with the other. 

Wednesday, November 28, 2012

Red Couscous with Red Vegetables

Red CousCOus With Red Vegetables

Couscous has it's origin in the northern African cuisine 


A basic Couscous dish is always prepared in a few minutes and opens a wide field of various options. 

My Rating 

(feel free to add your own in the comments)
  • ☆ Taste - Exotic spices can really enhance this, but you might not have them at work, and without those it's still very good.
  • ★☆ Price - I spent about 3€.
  • ☆☆ Time - about 10 minutes. 
  • ★★★☆ Healthiness - 
  • ★☆ Simplicity - One pot is enough to prepare this meal


Ingredients

  • 75g Dry Couscous
  • 1 Red Bell Pepper
  • 1 Tomato 
  • 2 Spring onions
  • 1 Spoon of Mustard (spicy)
  • 3 Spoons of Tomato paste

Directions

  1. Fry the bell pepper with the white ends of the spring onions with some veg oil in a small pot at highest temperature. 
  2. Cut the tomato in little pieces and add them.
  3. Add the mustard with some salt, pepper and vinegar.
  4. Put the whole mass at one side of the pot and put the dry couscous on the remaining part.
  5. Pour a glass of water over the couscous and mix everything.
  6. Let it cook until the couscous has absorbed the water and add some water if necessary.
  7. Put everything on a plate a decorate it with the green endings of the spring onions on top.

Make it Special

(these are optional and depend on your personal preference, time or money)
  • Use some indian or asian spices like masala.
  • Add a bit fresh yoghurt on top to make it taste fresher.

Tuesday, November 27, 2012

Fettuccine a la Spinaci

Fettuccine a la spinaci

Italian the easy way. Fresh spinach cooks in the blink of an eye.


The young and fresh spinach is a welcome for launch together with already prepared pasta this is done in a few minutes. If you need to cook the pasta first, it will take a little longer, but it's still very quick.

My Rating 

(feel free to add your own in the comments)
  • ☆ Taste - Very good, but some specials would make it even perfect.
  • ☆☆ Price - I spent about 4€ for this.
  • ★★ Time - about 5 minutes. 
  • ★★★☆ Healthiness - A lot of vegetables in here, with wholemeal pasta it'd be 5 stars.
  • ★★ Simplicity - Wow it was done so fast. 


Ingredients

  • 125g Cooked Fettuccine (or take 75g dry pasta and cook it)
  • 300g Fresh Young Spinach (preferably washed)
  • 1 Spoon of Cream Cheese
  • 1 Tomato (small or medium sized)
  • Basil (frozen or fresh leaves)

Directions

  1. Put a small pot with some water and the fettuccine onto the cooker and heat it up.
  2. Add the cream cheese, the basil, some salt and pepper.
  3. Cut the tomato into small pieces and add them. 
  4. Let it boil until the pasta is done and turn the cooker of. 
  5. Add almost everything of the spinach. It will lose it's volume quite quickly, so if it doesn't fit into the pot, just wait a second.
  6. Put everything on a plate and decorate it with some fresh spinach and basil. Bon Appetit :) 

Make it Special

(these are optional and depend on your personal preference, time or money)
  • Shaved Parmesan cheese on top for a stronger taste.
  • Add some fruity flavor with lemon juice and suggar. 
  • Season it the italian style with herbs like rosemary, oregano or thyme. 

Monday, November 26, 2012

Gnocchi in Beetroot Sauce

Gnocchi in Beetroot Sauce

Beetroot is healthy, yummy and easy to prepare. 


My Rating 

(feel free to add your own in the comments)
  • ★ Taste - Creamy & Fruity again :)
  • ★☆ Price - I spent about 3€ for this.
  • ★★ Time - about 5 or 10 minutes total. 
  • ★★★☆ Healthiness - Coconut milk is again not the healthiest but the beetroot rocks.
  • ★☆ Simplicity - It's done in a snap but be careful with the juice which is hard to get off you clothes again.


Ingredients

  • 150g Gnocchis from the fresh shelve (they must not be dry)
  • 300g Conserved Beetroot (it must not be raw, or it will take ages)
  • 100ml Coconut Milk (if you don't have any, normal milk is fine)

Directions

  1. Use a small pot to put the beetroot and a little bit of veg-oil in.
  2. Cut the beetroot inside of the pot to avoid squirting juice.
  3. Let it fry a little for a more intense taste.
  4. After a few minutes, add the coconut milk and the gnocchis.
  5. Let it cook for moment, so that the gnocchis can soke up the sauce a little.
  6. Season it with salt, pepper and basil.

Make it Special

(these are optional and depend on your personal preference, time or money)
  • Instead of putting the gnocchis directly into the pot, cook them in separate one. 
  • Add a spring-onion: Cut it into small rings and fry the white ones together with the beetroot and use the green rings for decoration on top.
  • Add some basil on top. 


Friday, November 23, 2012

Gnocchi Autum Style with Pear and Kaki

Gnocchi Autum Style with Pear and Kaki

Mixing there different cultures in one pan.

Italian Gnocchi, German pear and Japanese Kaki meet for launch - for your launch :). Have a good start into the weekend with this slightly sweet, but still robust combination. 

My Rating 

(feel free to add your own in the comments)
  • ★ Taste - Creamy & Fruity again :)
  • ☆☆ Price - I spent about 5€ for this, but I still have something left, so it's alright.
  • ★☆☆ Time - about 20 minutes total. The smaller you cut the pumpkin the quicker it's ready.
  • ★★ Healthiness - Maybe a bit more fat than needed, but you may use less cream cheese or oil.
  • ★★ Simplicity - Most of the work is done in two minutes.

Ingredients

  • 200g Gnocchis from the fresh shelve (they must not be dry)
  • 1/2 Pear
  • 1/2 Kaki
  • 1 Small Carrot
  • 2 Spoons of Cream Cheese
  • 1 Small Spoon of Rosemary

Directions

  1. Put a large pan on the oven, power it up, put some veg-oil into it and distribute it.
  2. Cut the pear, the kaki into cube-formed pieces and put them into the pan.
  3. Cut the carrot into slices and add them.
  4. Let everything get hot and add the Gnocchis.
  5. Stir everything from time to time. 
  6. After about 10 to 15 minutes add the cream cheese and a bit of water or milk. 
  7. Season it with Rosemary salt and pepper according to your taste.

Make it Special

(these are optional and depend on your personal preference, time or money)
  • Use sour cream instead of cream cheese for a fresher finish.
  • To make the gnocchi more crispy, stir fry them in a different pan and merge both portions when you serve them.

 Enjoy :)

Copyright 2012 by Tim Oppermann

Thursday, November 22, 2012

Quick Pumpkin-Coconut-Lentils-Soup


The Rest of the Pumpkin of yesterday and even more delicious.


As I just used half a Hokkaido yesterday I used the other half today for a similar dish - but a whole different taste. 
Other than that I just realized that this receipe is completly vegan, as long as you use veg-oil and water instead of milk.


My Rating 

(feel free to add your own in the comments)
  • ★ Taste - Creamy & Fruity... and as I said, I just love pumpkins :)
  • Price - I spent about 2€ for this; having some leftover pumpkin part from yesterday.
  • ☆ Time - about 30 minutes total. The smaller you cut the pumpkin the quicker it's ready.
  • ★★ Healthiness - Coconut cream has a lot of saturated fat. But I guess this dish is still better than burger with fries.
  • ☆ Simplicity - Pumpkins can be hard to cut, but it's possible with a standard knife.


Ingredients

  • 1/2 of a little Hokkaido pumpkin
  • 200ml of coconut cream
  • 200g of preserved lentils (or use ~100g of dryed red lentils and prepare them)


Directions

  1. Put a small sized pot with some oil in it onto the cooker at highest temperature.
  2. Cut the half Hokkaido into small pieces. Put them into the pot whenever you can.
  3. Stir from time to time and keep on cutting.
  4. Add the coconut cream.
  5. Cover the pot and let it cook for about 15 minutes. In the meantime, use a fork to smash the pumkin peaces a bit. 
  6. Add some water or milk if it is becoming too dense.
  7. Season it with salt, pepper and soja sauce.


Make it Special

(these are optional and depend on your personal preference, time or money)
  • If you like asian curries, you can add some coriander or ready made curry paste while the pumkin is fried.  
  • Use chilli powder or a fresh red chilli instead of pepper to make it a bit more spicy.
  • You can have rice instead of lentils as well. However, this might require a second pot and I think that lenils are also healthier. 


 Enjoy :)

Copyright 2012 by Tim Oppermann

Wednesday, November 21, 2012

Pumpkin-Carrot-Soup

Pumpkin-Carrot-Soup in 30 Minutes

A Healthy and Delicious Way into the Cold Season of the Year

The cold season has begun and it brings us delicious pumpkins to work with. Today I made an awesome soup at work with half a pumpkin, carrot juice and a little bit of potato powder. 

My Rating 

(feel free to add your own in the comments)
  • ★ Taste - Delicious, because I simply love pumpkins.
  • ☆ Price - I spent about 3€ for this. 
  • ☆ Time - about 30 minutes total.
  • ★★★★ Healthiness - Only vegetables here, so I think this keeps you really fit. 
  • ☆ Simplicity - pumpkins can be hard to cut, but it's possible with a standard knife.

Ingredients

  • 1/2 of a little Hokkaido pumpkin
  • 500ml of carrot juice
  • 2 spoons of  potato power
  • 1 spoon of chineese soja sauce (but any other works fine)

Directions

  1. Put the carrot juice into a medium sized pot. 
  2. Power up the cooker at highest power until the juice is cooking. Then, reduce the heat to medium intensity.
  3. In the meantime cut the Hokkaido pumpkin (or a part of it, like a half or a quarter, depending on its size) into small pieces. Put them into the pot whenever you can.
  4. Cover the pot and let it cook for about 15 minutes.
  5. Season it with salt, pepper and soja sauce.

Make it Special

(these are optional and depend on your personal preference, time or money)
  • If you like to you can add some ginger or cumin. 
  • You may add some cream and herbs like cives, coriander or parsley.
  • If you are not sensible about your breath add some raw spring onions on it (both the green and the white part are fine).


About iCanteen

The aim of this blog is to talk about healthy and efficient cooking for everybody at work. Because cooking at work is not the same as at home, you have to consider a lot of things there. For example you are limited in time and equipment and you don't want to scare customers away with an intense smell of onions, garlic, meet or fish. More than that you might want to eat healthy and good everyday.  
I cook almost on a daily basis at my work place for launch. Considering all of the restrictions I sometimes make a really good job at it and I draw a lot of attention at my company. Because many people have been asking me about what I am performing there at the cooker I've decide to write about it, so that I can share my experience for others.
I'm looking forward to write here on an almost daily basis and invite you to share your ideas with me.